Showing posts with label 2013 Quilts. Show all posts

Monday, September 9, 2013

Prioritizing

 I’m feeling a little haphazardish today.  Is that even a word?  I have about a dozen things that need some attention today but I know I can’t get to them all.  I'm halfway through my day and I just realized that I was darting from one thing to another without really accomplishing anything.  Not a good strategy Andy.

This weekend I was finally able to get some good photos of my most recently finished quilts but here they sit on my computer until I have time to go through them.  I did dig through and find this one photo.

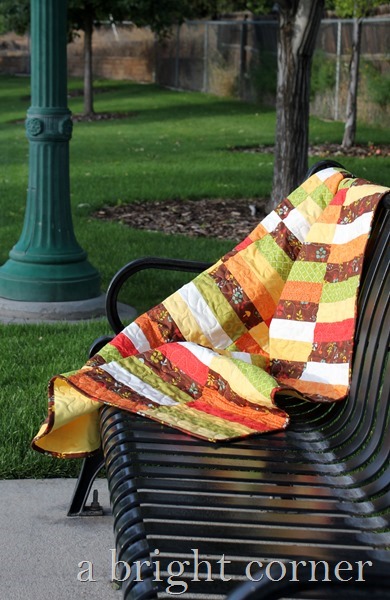
Pretty Fall Quilt

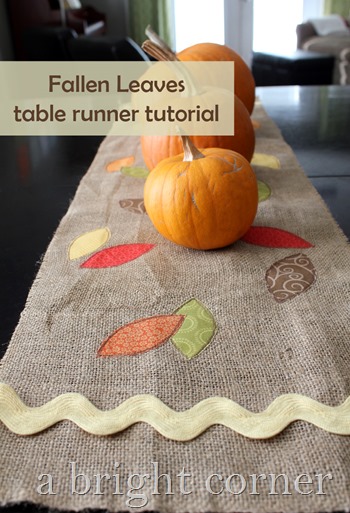
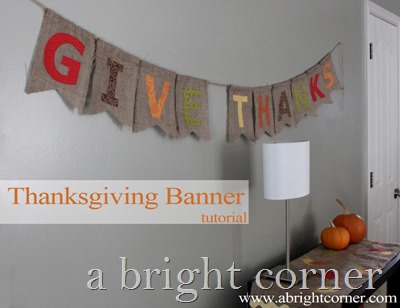
This quilt came from a stack of leftovers from these two tutorials I did last year.  I added a bit of Wee Woodland fabric and I was able to get a small throw size quilt. 

fallen leaves table runner tutorial

Cute Thanksgiving Banner using burlap

I’ll be back tomorrow with more photos of the quilt and a free pattern to boot!  Thanks for stopping by!


Tuesday, July 2, 2013

Flirty Charms

This is another quilt that was finished a few months ago but never appeared here on the blog.  I started with a couple of Flirt charm packs and a bunch of Kona Snow and this was the result:

Charm quilt idea from A Bright Corner


I shuffled all of the charms, stacked three or four together and cut them like this:

charm cutting diagram

I then sewed two halves together using two different prints and making sure two reds were not together, two blues not together, etc.  These got sewn into long strips.  Is this making any sense?

I alternated the strips with long strips of Kona Snow, and the width of the Kona Snow strips are all different.  


quilt binding 

When I started quilting this I began with kind of a loopy meandering with a few “loose” hearts mixed in.  But my always helpful boys decided that the “loose” hearts looked more like little bums.  So I made sure to keep my hearts looking more like real hearts. 

charm quilt

The finished quilt measures 53" x 60"

Friday, June 28, 2013

Whirled in black and white


Waaaay back in January it was my turn to choose a block for our do. Good Stitches group.  Just this week I was able to get the quilting and binding done on the quilt.  The quilt block is called “Whirled.”  It’s an easy block that sews up quickly. 

8/1/25 edited to add: You can find the Whirled quilt pattern here in the A Bright Corner pattern shop

whirled 1

I chose a light blue for the backing and binding.  Now that’s it’s finished I’m wishing I had chosen something a bit brighter – red or aqua maybe.  But the light blue works too, don’t you think? 

whirled 5

The quilt measures 48” x 60”.  I was just looking back through some photos from earlier this year and I realized this is quilt #14 for 2013.  Fourteen quilts completed so far!  That’s a new record for me.  Last year I think my total was 17 quilts. 

whirled 6

Now this one gets shipped off to Threading Hope.  Thanks for stopping by the blog – hope you are staying cool this weekend.  It’s a hot one here.  I hear it’s supposed to break 100 degrees this weekend.  Ug!  

Linking up to Finish It Up Friday at Crazy Mom Quilts

Monday, June 24, 2013

Madeline: a baby quilt


Back in March (was it really that long ago?) I did a unique custom order for a woman.  It was a fun one to do too.  The white squares each had a written message on them.  Friends and family members had been given the squares at the baby shower and were asked to write a message to the new baby.  I was sent all of the fabric, batting and thread and asked to use the squares in a quilt.

Baby shower quilt by A Bright Corner

The backing was a sweet pink and white flannel – nice and cozy!

baby shower quilt backing

It had been a few years since the baby shower and the “baby” is now three.  (There’s no judgement from me – I have unfinished projects from three years ago too!)  This big-girl quilt was a gift for her third birthday.  I hope Madeline enjoys her quilt for years and years!

baby shower quilt label

(I covered over Madeline's last name)


Saturday, May 11, 2013

Friendship Star quilt


Last Summer I bought a stack of these Alpine Wonderland (Riley Blake) Christmas fabrics (I think they were 1/2 yard cuts) and soon after came up with a great idea for using them.  I fussy cut some blocks and then the whole stack of fabrics had to be shelved for a while.  By the time I pulled them out again I had changed my mind about the quilt.  By this time it was December and I mostly just wanted to get my Christmas quilt finished by Christmas.  I know you know how it is.

I still wanted to use the fussy cut squares so this is what I ended up with:

Friendship Star Christmas Quilt from A Bright Corner Quilts

This block is called the friendship star and it’s a fast one to put together.  I made two sizes of star using the three fabrics and then arranged them on the design wall.  I then figured out how to sash them in white to keep their placement.


The rest of the fussy cut squares went in to the border.

Friendship Star Christmas Quilt from A Bright Corner Quilts

I had fun with the backing.  My goal was to use up every last bit of the Alpine Wonderland fabric on the back – success!

quilt back from A Bright Corner quilts

I actually finished this quilt some time between Christmas and New Years but never blogged about it. 

Now here are a  couple of confessions for you.  #1:  This is a Christmas quilt, but I still have it hanging in my living room.  And it’s May.  I just love the colors.  Confession #2:  Here is a pic of the quilt all nicely folded on the quilt ladder…

Friendship Star Christmas quilt from A Bright Corner

…and here is what the original photo looks like.  I make a big mess of my living room when I take photos of quilts.  Everything gets rearranged.  Photos come off the wall.  Furniture pushed to the side.  Sometimes I even sweep. 

behind the scenes at A Bright Corner

Now you know.  Keepin’ it real people. 

Tuesday, May 7, 2013

Doodle Stitching

A few weeks ago I decided to try my hand at embroidery.  Well, try my hand again.  I vaguely remember doing a bit of embroidery when I was younger – something on a tea towel maybe?  I can’t remember exactly.  So one day I was killing time in my local JoAnns and came across this sweet book:

Doodle Stitching embroidery book

Of course I didn’t have a coupon with me (I always forget them!) but I bought the book anyway, as well as some embroidery floss and a small hoop. 

It didn’t take me long to decide which little design I wanted to try first.  I used the enclosed CD to get the image on my computer and enlarge it to the size I wanted.  I used a  blue (water soluble) marking pen (and the window) to trace the image onto a piece of Kona White from my scrap bin. 

embroidery

Then I got to work.  My 5 year old “helper” decided he should unwrap the floss and throw away the “wrappers” so I now have no idea what colors I used. 

embroidery

In the book, Aimee shows all of the needed stitches with easy-to-follow diagrams and descriptions.  For this project I think I only used two or maybe three different stitches and once I got going it was really easy – and really relaxing!

When it was finished I decided to turn the little embroidery piece into a 12” mini quilt and hang it on this Ackfeld Wire table stand. 

bird embroidery block on an Ackfeld Wire stand

Have you seen these table stands? My mom sent it to me for my birthday and I love it – it’s the perfect size for a mini quilt and it fits so nicely on my top shelf in my sewing room.  

bird embroidery block on an Ackfeld Wire stand

It was nice to do some hand work for a change and take a step back from some of my larger projects.  Do you do embroidery?  What do you do with the final project?  Pillows?  I want to do more but I’m just not sure what I would DO with it!

By the way, you can see more of Aimee Ray here in her shop and on her blog.

Thursday, May 2, 2013

Community

 A few weeks ago I was feeling oh so worn out and not very creative at all.  At.  All.  It’s a frustrating feeling for me.

That same week I came across a book that I fell in love with and has been immensely helpful to me.  The book is “Steal Like An Artist” by Austin Kleon.  It’s a small book – a quick read – but full of great ideas.  Don’t be put off by the title.  It’s not really about stealing.

The part of the book that helped me the most during this period of feeling uninspired was this:

“Take time to be bored.  One time I heard a coworker say, “When I get busy, I get stupid.”  Ain’t that the truth.  Creative people need time to just sit around and do nothing.  I get some of my best ideas when I’m bored…”

I can’t say that I’m bored very often, but since reading that I have made an effort to hollow out a bit of time each day to stop, sit and do nothing.  I also put away all of my WIPS into the closet, set aside the patterns I’m working on and other assignments that I have.  I pulled fabric from my stash that I love and I started to play. 

It was delightful. 

This is what came from it. 

Community- modern quilt from A Bright Corner

and here’s the back:

Community- modern quilt from A Bright Corner

As I was working on this quilt I was thinking about what it means to belong to a community.  I am a member of many communities, some tighter, and some more loose and less defined.  For instance I belong to a physical community here in my neighborhood- small and defined by where we live.  I also belong to a quilting community, blogging community, religious community, etc.  Each of these are so different from the next.  As I worked on this quilt top, I considered how I fit into each different community.  Then came the day of the Boston Marathon.  I had never considered myself to be a member of the running community until then.  I run, but I don't consider myself a "runner."  But seeing the running community unite so quickly and powerfully was a moving thing.

This was a great project for me.  It’s not big – just 48” x 50” and it will eventually hang on the wall of my sewing room.  Next week it will be at the Salt Lake Modern Quilt Guild’s display at the HMQS show in Salt Lake. 

Community- modern quilt from A Bright Corner

It was a lot of fun to create something just to create.  And I remembered why I enjoy it so much.

Community- modern quilt from A Bright Corner

And now I’ll always have a reminder of how important it is to give myself time and space to do “nothing.”

Community- modern quilt from A Bright Corner

Saturday, April 6, 2013

Scrap Stacks

Several weeks ago I did a brief but productive “spring cleaning” of my fabric closet.  I have a shelf in there where I keep stacks of project leftovers.  If there are enough leftovers from a project to make a whole other project then I don’t separate them into the scrap bins.  I stack them together (if they’re small I use a ziplock) and set them aside for another time.  It’s my goal this year to clear out some of those scrap stacks.

The first scrap stack project I completed was this quilt made from the Honey Honey scraps.  This next project is the second.  I have a total of 8 or 9 scrap stacks up there on that shelf.  Think I can clear them all out in 2013? 

These are the scraps from this quilt.   I pressed and measured them and found I had enough to make a small table runner.  I love the Noteworthy line so I’m happy to put the leftovers to good use!

Table runner made from fabric scraps

I trimmed off the selvedges, and cut each piece into strips of varying widths.


Table runner made from fabric scraps

Then I arranged them.  Two of the pink strips were shorter than the others so I pieced them with a scrap of white so they’d be usable. 

Table runner made from fabric scraps

I sewed the strips together, pressed it well, and then trimmed all of the edges.  See how quickly this is coming together?  Perfect for a scrap project!

Table runner made from fabric scraps

I had a piece of Kona Tarragon that was the perfect size for the backing.  The whole thing got a quick spray-baste and it was ready for some quilting.

Table runner made from fabric scraps

I used my walking foot and did some slightly wavy lines down the whole length of the runner. 

Table runner made from fabric scraps

The little bit of wave in each line helped to soften up the look of the final table runner.  I finished it with one more piece of scrap for the binding. 

Table runner made from fabric scraps

The finished table runner measures 18” x 28” and it does a fabulous job of brightening up my kitchen on those gray, rainy spring days! 

Wednesday, March 20, 2013

Balance


Is time going noticeably faster or is it just me? 

I’ve been thinking a lot about balance lately.  Right now our family is really, really busy.  Really.  Busy.  I know, I know – we’re all busy, right?  I think everyone goes through times when they have to just be a little better at balancing everything in their lives.  Maybe there’s some event that requires an immediate altering of a family’s priorities.  Maybe it’s just an individual wanting to change something about their life. 
For me right now it’s just trying to make it to May.  Mr Bright Corner is on the team that is making this:

 
  Disney-Infinity-logo

The deadline to get this game wrapped up is quickly approaching.  While he’s working crazy, crazy hours, the rest of us are trying to maintain some semblance of normalcy around here.  The kids still have school, friends, fun, scouts, karate, homework & chores.  And I still have – well…everything else. 

Each day I have a list (virtual, not actual) of many, many things that need to be done – most of which are good, important and even necessary.  There’s certainly not enough time in my day to do them all.  So I get to choose – and to learn balance. 

My quilting time has been cut quite a bit and now it’s mostly between the hours of 10pm and midnight.  Blogging time is pretty much eliminated -if you haven’t noticed :)  I’m still here though, and I am getting a few things done!  It’s important to me (and my sanity) to spend time each day doing something creative.  I make sure that no matter what else is going on, I save time for that.   

Last week I was able to get this Honey Honey project quilted and bound:

Honey Honey scrap quilt

My first post about this quilt is here.  It’s made from all of the scraps left from one of the Sweet Talk quilts that I made. 

I love the soft flannel on the back.  I’ve decided that I need a new napping quilt – one with a flannel back. 

Honey Honey scrap quilt

The finished quilt measures 44” x 57” and is now in a stack ready to go to our local Project Linus coordinator. 

Ok.  Deep breath.  Off I go.  More balancing to be done!

Thursday, February 14, 2013

Honey Honey + Sweet Talk


Now that’s a perfect post title for a Valentine’s Day post!  I hope you all are having a chocolate-filled day!
I just wanted to show you another of my recent quilt finishes:

Sweet Talk quilt pattern using Honey Honey by Moda

This quilt was made with this stack of FQ and my Sweet Talk quilt pattern.  I love that I’ve been able to work with so many pink fabrics lately!

Sweet Talk quilt pattern

I think that this fabric line was perfectly named.  There are a couple of honeycomb prints with sweet little bees and the other prints are flowers, flowers and more flowers! 

Honey Honey fabric line by Moda

My most favorite print is Linen Sunset.  De-lish-ous blooms everywhere.  I used it as the backing but I think it would make a lovely quilt just on it’s own. 

Honey Honey fabric line by Moda

This quilt was made to be a sample for the Fabric Mill so they get to enjoy it for awhile but I cannot wait to get it back!

Friday, February 8, 2013

Sweet Talk quilt + pattern

Here’s my latest finish!  I finally decided what to do with this fat quarter stack of Noteworthy:

Sweet Talk quilt pattern

The fat quarters were sliced and diced into some (okay a lot of) half square triangles.  I added the large heart in the bottom corner as a homage to a certain upcoming holiday.  The heart in the top left corner was added because I was missing just ONE dang HST.  Not worth buying more fabric for.  So I used scraps and appliqued the pink heart onto a white square.  I think it adds just a wee bit o’ charm.

Sweet Talk quilt with cute heart applique

For the quilting I tried a new-to-me pattern – large loops combined with gentle waves.  I like the softness of it!  You can sort of see it in the photo above, and better in the next two photos:


Sweet Talk quilt with waves and loops quilting


Sweet Talk quilt with waves and loops quilting

The binding is the pink stripe from the Noteworthy line.  It does a great job framing the quilt without being overpowering. 


Sweet Talk quilt from A Bright Corner

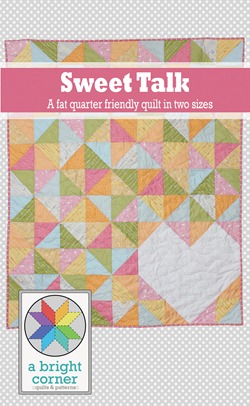
I’m calling this quilt “Sweet Talk” and the pattern is available here and here.  The pattern includes instructions for a throw size (50” x 60”) and a twin size (71” x 88”)

Sweet Talk quilt from A Bright Corner

Here are the details for this quilt:
finished measurement: 50” x 60”
fabrics used: 11 fat quarters (Noteworthy by Sweetwater for Moda) and Kona Snow
Binding: Kisses Get Skinny (Noteworthy)

Linking up to Finish It Up Friday at Crazy Mom Quilts


Tuesday, January 29, 2013

Circle Time


A few weeks ago I was at my LQS and was talking to a woman about table runners.  She mentioned that she had a small, circular table and was always looking for table toppers that would fit.  Once she mentioned it I realized that I don’t see many around blog land.  I loved the idea of making a circle shaped table topper using the same vases and leaves from my rectangular runner idea. 

I played with different sizes of circles and different sizes of vases and ended up with this:
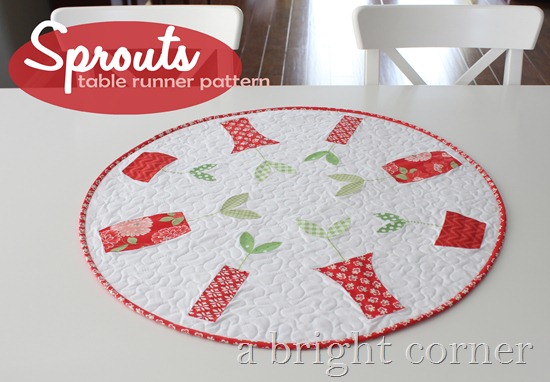
Sprouts Table Runner and Topper pattern
[pattern is available here and here]

It measures about 27” in diameter.  Even though it was intended for a round table, I think it still looks great on a rectangular one. 

For this red version I used several different applique stitching techniques, but they are all still done on a machine.  I first appliqued the vases, using one of the “blanket stitch” settings.  I added the detail lines to the pot using just a regular straight stitch, and just eyeballing where the lines should go. 

Cute applique vase and leaves

For the leaves I used a straight stitch, carefully stitching close to the edge of each leaf.  Then I went back and added the detail stitch down the center of each leaf.  The stems were created by first drawing in the stem with a light pencil line, then going over that with a tight zigzag stitch. 
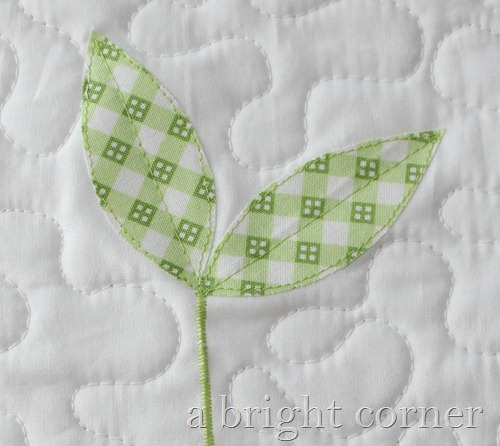
Cute applique leaves


When it came time to do the binding I was a little concerned about how it would turn out.  First of all, it requires bias binding.  Ok, no problem.  But I wanted to be able to do the binding completely on the machine – that’s where I was concerned. 

Sprouts table topper pattern


The bias binding sewed to the front of the topper just fine.  I folded it around to the back, used a generous amount of binding clips and began sewing.  It went beautifully!  As long as I took my time and didn’t try to rush too much (it’s hard to be patient when a project is SO close to completion!) then it went smoothly. 
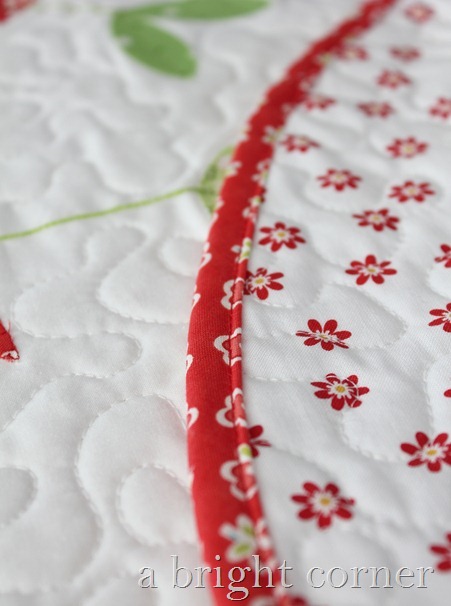
Sprouts table topper with red binding

It is interesting how the change in just the stitches can alter the feel of the finished topper.  If you haven’t seen it yet, you can take a look at a more artistic feel to the same project here.  Tomorrow I’ll show you the small pink version of this pattern which uses a different set of stitches. 

The Sprouts pattern is still on sale for 20% but just for a few more days!  Add the pattern to your cart here and then use the code “springsprouts” at checkout to receive the discount.  Offer good until Feb 1, 2013.
Related Posts Plugin for WordPress, Blogger...